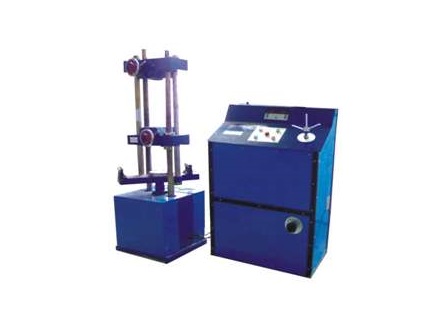

UNIVERSAL TESTING MACHINE: Analog/ Digital/ Computerised
AS PER IS: 1828 & BS 1610.
Introduction: Universal Testing Machine is designed for testing metals and other materials under tension, compression bending, transverse and shear loads. Hardness test on metals can also conducted.
Operation of the machine is by hydraulic transmission of load from the test specimen through pressure transducer to a separately house load indicator. The system is ideal since it replaces transmission of load through levers and knife edges, which are prone to wear and damage due to shock on rupture of test pieces.
Load is applied by a hydrostatically lubricated ram. Main cylinder pressure is transmitted to the pressure transducer housed in the control panel. The transducer gives the signal to the electronic display unit corresponding to the load exerted by the main ram. Simultaneously the digital electronic fitted on the straining unit gives the mechanical displacement to the electronic display unit. Both the signals are processed by the microprocessor and load and displacement is displayed on the digital readouts simultaneously.
Electronic Control Unit : Consists of
| Specifications/Model | Units | UTE10 | UTE-20 | UTE-40 | UTE-60 | UTE-100 | UTE-200 |
| Maximum Capacity | KN | 100 | 200 | 400 | 600 | 1000 | 2000 |
| Measuring Range | KN | 0-100 | 0-200 | 0-400 | 0-600 | 0-1000 | 0-2000 |
| Load Resolution (20,000 counts full scale) | N | 5 | 10 | 20 | 30 | 50 | 100 |
| Load Range with Accuracy of measurement± 1.0% | KN | 2 to 100 | 4 to 400 | 8 to 400 | 12 to 600 | 20 to 1000 | 40 to 2000 |
| Resolution of piston movement (Displacement) | mm | 0.1 | 0.1 | 0.1 | 0.1 | 0.1 | 0.1 |
|
Clearance for tensile at fully descended working piston.
|
mm | 50 - 700 | 50 - 700 | 50 - 700 | 50 - 800 | 50 - 850 | 50 - 900 |
|
Clearance for compression test at fully descended working piston.
|
mm | 0 - 700 | 0 - 700 | 00 - 700 | 0 - 800 | 0 - 850 | 0 - 900 |
| Clearance between columns. | mm | 500 | 500 | 500 | 600 | 750 | 850 |
| Ram Stroke | mm | 150 | 200 | 200 | 250 | 250 | 300 |
| Straining/piston speed (at no load) | mm / min | 0 - 300 | 0 - 150 | 0 - 150 | 0 - 100 | 0 - 80 | 0 - 45 |
| Connected Load | |||||||
| Power (W) | KW | 1.0 | 1.0 | 1.7 | 1.9 | 2.6 | 4.9 |
| Voltage (V) | V | 400 - 440 | 400 - 440 | 400 - 440 | 400 - 440 | 400 - 440 | 400 - 440 |
| Phase (Ø) | ø | 3 | 3 | 3 | 3 | 3 | 3 |
| Weight (approx.) | Kg | 1500 | 1500 | 2500 | 3500 | 5500 | 9500 |
| Standard Accessories | |||||||
| For Tension Test | |||||||
|
mm |
10 - 20 20 - 30 |
10 - 20 20 - 30 |
10 - 25 25 - 40 |
10 - 25 25 - 40 40 - 55 |
10 - 25 25 - 45 45 - 70 |
20 - 40 40 - 60 60 - 80 |
|
mm |
0 - 10 10 - 20 |
0 - 10 10 - 20 |
0 - 15 15 - 30 |
0 - 15 15 - 30 |
0 - 22 22 - 44 44 - 65 |
0 - 20 20 - 45 45 - 70 |
|
mm | 50 | 50 | 65 | 70 | 70 | 90 |
| For Compression Test | |||||||
|
mm | 120 | 120 | 120 | 120 | 160 | 220 |
| For Transverse Test | |||||||
|
mm | 160 | 160 | 160 | 160 | 160 | 200 |
|
mm | 30 | 30 | 30 | 50 | 50 | 70 |
|
mm | 500 | 500 | 500 | 600 | 800 | 900 |
|
mm | 6, 12 | 6, 12 | 12, 16 | 16, 22 | 16, 22 | 30, 40 |
Office: S. N. 37/02, "Ashtavinayak Indl. Estate",
Parvati Nagar, Dhayari Narhe Road,
Next to Pari Robotics, Narhe, Pune-411041
Tel fax: (020) 24690312,
Email: sales@xeepl.com, xeepl.pune@gmail.com